You just made a fresh install of Windows 11, and you can't get your old and loyal Canon printer to work? No problem, you've come to the right place!
You may not have noticed it, but even if the CD Setup Routine seems to hang, it actually DID install the driver, just could not register it with the actual printer.
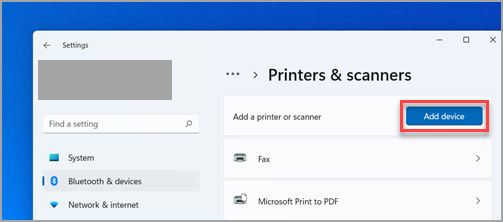
In order to do so, just select Start > Settings > Bluetooth & devices > Printers & scanners. Next to Add a printer or scanner, select Add device:

and then after a while, you will be able to select "Add manually".
There, select the last option "Local Printer", and on the next screen, select the right USB port. Next, you will be able to choose the Canon Printer Driver. When prompted, ask for an install of this "new" driver instead of keeping the present one, and see there, the setup is successful, and you can print your test page ;-)
If you wish to have the IJ Scan Utility, you will need to install it separately from the CD though. Its SETUP program should be in the folder "win\Driver\SCNUTIL\ScanUtility".
Now, after restarting Windows, to get the scanner working, you will need to re-run the SETUP program from the CD again. This time, make it run in compatibility mode with Windows 7, and choose the re-configuration option when prompted. Voilà! IJ Scan Utility should work now :-)
No comments:
Post a Comment